


 143
143

POLICY | Manage Policy Workflows
Use the Policy Module to efficiently manage underwriting tasks, including quotes, policy issuance, and workflow management. This guide helps you navigate the module, filter tasks, and update policy statuses to streamline your workflow.
What You'll Need
- Access to the Policy Module
- Assigned user account with necessary permissions
- Estimated time: 10-15 minutes
Prefer a visual walkthrough? Watch the short video below for a guided overview of managing policy workflows.
➡ ➡ ➡ Watch The Video Walkthrough Here!
Step 1: Access the Policy Module
Start by selecting the Policy Module from the main dashboard. This module is where all underwriting activity, including quotes and issued policies, is managed. It serves as the entry point for handling policy-related workflows.

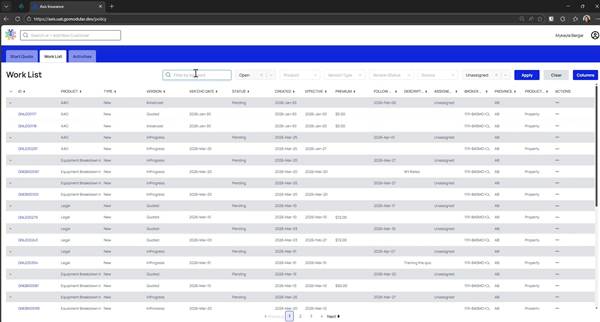
Step 2: Navigate to the Work List
Click on the Work List tab. This central dashboard displays all items across various statuses — open, pending, active, and closed. The work list is crucial for tracking and managing policy tasks efficiently.

Step 3: Filter Items by Keyword
Use the search bar to filter items by entering a keyword, such as an insured name or product type. This helps you quickly locate specific entries in the work list.
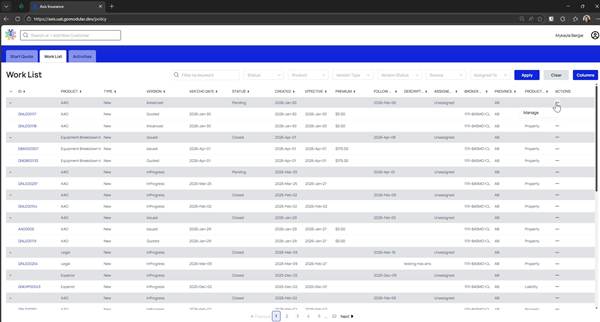
Step 4: Manage Policy Status
Open the Manage Policy Modal by clicking the ellipses under "actions" next to a policy. Here, you can assign the policy to an underwriter, update its status, and set relevant dates. This is vital for keeping track of policy progress.
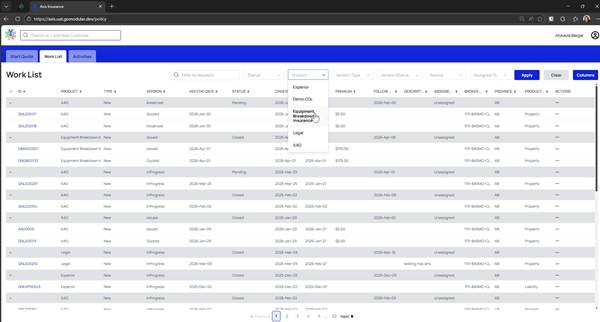
Step 5: Apply Product Filters
Open the Product dropdown, select a specific product like "Equipment Breakdown Insurance," and apply the filter. This narrows down the list to relevant policies, making it easier to manage specific types of insurance.
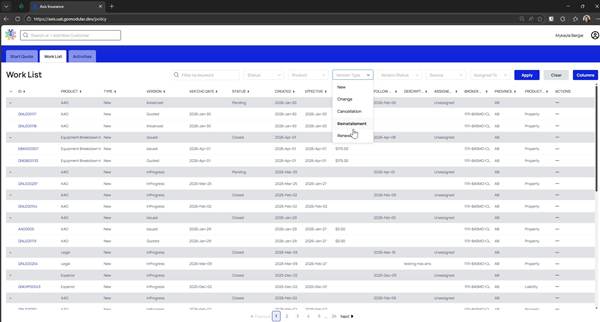
Step 6: Filter by Version Type and Status
Utilize the Version Type dropdown to filter for specific transaction types, such as "Renewal." Similarly, filter by Version Status to view items like "Issued" policies. These filters allow you to manage workflows effectively based on current policy status.
Tips and Best Practices
- Regularly update policy statuses to keep the workflow current and accurate.
- Use keyword filters to quickly locate and manage specific insured accounts.
- Familiarize yourself with version types and statuses to streamline task management.
Troubleshooting
Why can't I see any policies in the work list?
Ensure you have selected the correct filters and cleared any unnecessary ones. Double-check your permissions to confirm access to the relevant policies.
Why is the status dropdown not working?
If dropdowns are unresponsive, try refreshing the page. Ensure your browser is up-to-date and supports the system's requirements.
How do I assign a policy if the option is missing?
Make sure you have the appropriate permissions to assign tasks. Contact your system administrator if you believe you should have access.
Summary
You've now learned how to navigate the Policy Module, manage workflows, and filter tasks effectively. Next, consider exploring other modules like Claims or Finance to extend your management capabilities further.
Frequently Asked Questions
Can I save my filter settings for future sessions?
Currently, the system does not support saving filter presets. You will need to reapply filters each session.
How do I view closed policies?
Use the status filter to select "Closed" or "Issued" to view policies that are no longer active.
What if I accidentally change a policy status?
You can reverse changes by selecting the appropriate version type or contacting support for assistance with complex issues.
Is there a way to export the work list data?
Export options may be available depending on your system configuration. Check with your IT department or system administrator.
Can I assign multiple policies at once?
Batch assignment might not be available in this module. Assign policies individually or contact support for bulk action solutions.

